GOING GREEN & LIVING HEALTHY
This website is all about going green and living healthy which is good for us and good for Planet Earth.
Living green is a long journey of baby steps leading to healthy living.
This is a living document and we'll be adding to it every day with your help.
RELATED SITES

GOING GREEN AND LIVING HEALTHY


Scientists tell us that Humans have walked the Earth for some 190,000 years, a mere blip in Earth's 4.5-billion-year history. A lot has happened 4.5 billion years. Planet Earth was created and oxygen levels rose in the foundational years of the Precambrian. The productive Paleozoic era gave rise to hard-shelled organisms, vertebrates, amphibians, and reptiles. Dinosaurs ruled the Earth during the Mesozoic. And 64 million years after dinosaurs went extinct, modern humans emerged in the Cenozoic era. The planet has seen an incredible series of changes. Now with billions of humans occupying the planet, we are doing significant damage to the planet.
In less than one century, we have managed to move away from the land of our forefathers, create huge, unnatural cities where we squandered billions of tons of oil driving around the planet and heating and cooling our homes. A host of labor saving appliances and TV were invented allowing humans to become couch potatoes. We evolved into a throw-away society supporting thousands of factories that poisoned our environment with high levels of toxic pollution.
WHAT DOES GOING GREEN MEAN?
Going green does not mean you have to surround yourself with wind generators or invest thousands in solar panels. in fact, implementing alternate energy systems is one of the last steps in your journey toward going totally green.
Going green starts with an awareness of what can be done to conserve energy use and then taking a series of baby steps on the totally green journey.
Look around you at the number of garbage trucks in operation. It's pretty clear we have become a wasteful, "throw away" highly dependent society. Make a list of the steps you can take to ensure you're not part of the problem. For example:

1. Make a list of your weekly trips and figure out which can be eliminated or combined with other trips or car-pooled if possible.
2. Adjust your thermostat (higher in the summer, lower in the winter).
3. Turn down the temperature setting on your hot water heater. Wash more loads of clothes with less water and using the cold settings.
4. Start a garden using hand tools only. Add a greenhouse and grow vegetables all year long. Can and freeze your excess vegetables, berries, and fruit.
5. Start composting instead of sending organic materials like leaves and grass clippings to the dump.
6. Install a clothes line and start using the sun and wind to dry your clothes.
7. Consider installing a solar powered hot water heating system.
8. Close heating/cooling vents in all unused rooms and close the doors to them.
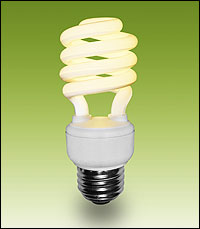
9. Replace all conventional incandescent bulbs with Compact Fluorescent (CFL) bulbs which are four times more energy efficient and provide the same lighting.
10. Take advantage of natural daylight by using light-colored, loose-weave curtains on your windows to allow daylight to penetrate the room while preserving privacy. Also, decorate with lighter colors that reflect daylight.
11. Use pressure cookers & microwave ovens for cooking. Pressure cookers and microwave ovens can save energy by significantly reducing cooking time.
12. Add layered clothing and keep room temperatures lower in the winter. In the summer, put on screens and install ceiling fans and turn off the AC when possible.
13. Take a basket or cloth bag to the store and avoid using the disposable plastic bags.
14 Walk instead of drive for shorter trips. Leave the polution machine at home whenever possible.
15. Plant dozens of fruit trees and berry plants every year. |
POINTS TO PONDER
Think about the impact that pulling billions of tons of oil out of the depths of the earth is having on planet rotation speed. A small change can cause major global climates changes causing flooding, storms and droughts. Instead of abusing our seemingly abundant resources by buying larger and larger SUVs and trucks often with a single person onboard, we need to shift our focus to smaller more efficient vehicles and eliminating wasted trips.
Going green also means we have a greater awareness of how we have let go of most manual tasks, moved away from the hoe, shovel and axe and relied instead on gasolene powered tools all in the interest of reducing our natural activities that kept our weight under control, strengthened our bodies, and kept such diseases as diebietes under control.
Inside the home, we now have appliances and robots that do virtually all manual labor like washing and drying clothes and dishes, heating and cooling our homes, and sweeping and vacuuming the home.
Clothes lines that once in common use for thousands of years have virtually disappeared from the planet. Going green means bringing back some more of the things that make efficient use of our God given wind and solar energy.
Going green means we begin to understand how everything we do affects our planet and that we begin to take our baby steps in the direction of conserving our precious resources, becoming physically more active, growing more of our own food, and in general taking greater control over our lives.
Prioritizing Your Green Baby Steps
The process of going green is much like a journey of well focused baby steps all leading in the direction of living green and healthy. As we looked at our various options, we elected to start with "Energy Conservation".
ENERGY CONSERVATIONAs I looked closely at how we could immediately begin reducing our monthly kilowatt, three things initially came to mind.
Turning Down the Heat Thermostat
I was amazed to see the energy savings from the simple action of setting the thermostat to under 65 degrees (in the Winter or over 80 degrees in the summer time).
(For each degree you turn down the thermostat in the winter, you'll save approximately 5% on your heating costs). Other related conservation steps include:
Closing the vents in unoccupied rooms
Installing Storm Windows
Weather stripping all doors.
Installing a Wood Burning StoveBy supplementing your central heat with a wood burning stove, you can substantially reduce your consumption of electricity if you happen to access to low cost firewood. In my case, I walk down to the woods with my axe and cut and split my own firewood.

Photo of Combination Heating/Cooking Wood Burning stove.
This commercially available wood burning heating/cooking stove makes efficient use of kindling.
Reducing the Cost of Hot Water
There are two ways to go with reducing your energy consumption for heating water. The first is to simply turn down the thermostat and use cold water where practical for washing clothes.
The second is to install a solar hot water heating system.
The benefits of installing a solar water heating system in your home are significant (the sun can provide 50-80% of your domestic hot water needs). A $3-$6K investment will last about 25-30 years or longer and can pay for itself with 5 years. Additionally, many state and local governments are actively offering rebates and tax incentives for people who choose to implement solar water heaters in their homes. The long term benefits could be significant as the cost of oil and other fossil fuels continue to rise. And you're helping the planet by not polluting the environment with fumes and exhaust from the burning of fuel.
Backup Power Generators
Its a good idea to have a good portable backup power system, particularly if you're using Wind Generators. There are many efficient, relatively low cost units on the market today.

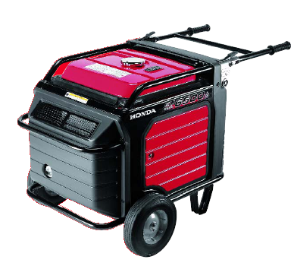
Photos of Commercially Available Backup Power Generators
Reducing Lighting Costs
Turn off the lights in any room you are not using and consider installing timers, photo cells, or occupancy sensors to reduce the amount of time your lights are on.
Switch to Compact Fluorescent Bulbs (CFL). Compact fluorescent bulbs are four times more energy efficient than incandescent bulbs and provide the same lighting.
Use CFLs in all the portable table and floor lamps in your home. Carefully consider the size and fit of these systems when you select them. Some home fixtures may not accommodate some of the larger CFLs.
When shopping for new light fixtures, consider buying dedicated compact fluorescent fixtures with built-in ballasts that use pin-based replacement bulbs.
For spot lighting, consider CFLs with reflectors. The lamps range in wattage from 13-watt to 32-watt and provide a very directed light using a reflector and lens system.
Take advantage of daylight by using light-colored, loose-weave curtains on your windows to allow daylight to penetrate the room while preserving privacy. Also, decorate with lighter colors that reflect daylight.
Turning Down the Hot Water Thermostat
Heating hot water accounts for a substantial part of our energy budget. Significant savings can be achieved by turning down the hot water heater thermostat.
Reducing Energy Requirements for Cooking
Use pressure cookers, microwave ovens, and wood cookstoves whenever it is convenient to do so. Pressure cookers and microwave ovens can save energy by significantly reducing cooking time.
Reducing Energy Requirements for Washing/Drying Our Clothes
This is another area for significant energy conservation.
Wash your clothes in cold water using cold-water detergents whenever possible.
Wash and dry full loads. If you are washing a small load, use the appropriate water-level setting.
Dry towels and heavier cottons on a clothes line and use the dryer for a short period of time to soften the towels and clothes.
PRODUCING OUR FOOD
Almost anyone can put in an organic garden and grow much of his or her own food while becoming more physically fit and improving the nutrition benefits of the harvest.
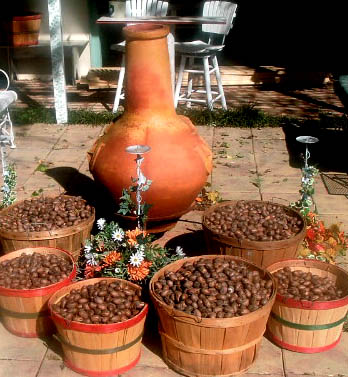
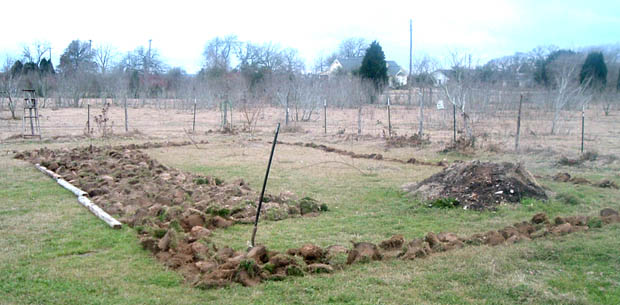
Photo of new garden plot being tilled with a shovel and a hoe. Note the compost pile that will be worked into the new garden.
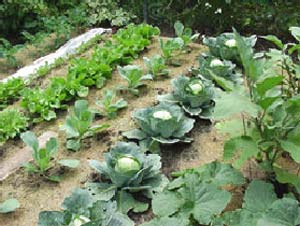
Photo of our winter vegetable garden.
A greenhouse lets you grow vegetables all year long and get a jump on plants for the spring garden.
MORE GARDENING TIPS
Amend your garden soil with organic matter. In the vegetable garden, the routine addition of soil amendments such as compost will optimize potential yields and produce quality vegetables. As a human health (e-coli) issue, the application of manure or compost made from manure should be made at least 4 months prior to harvest of any edible crops.
Manure and compost made from manure may be high in salts that will interfere with crop growth. Do not add more than 1" of manure or compost made with manure without a soil test to evaluate potential salt build-up.
Incorporate organic mulches into the vegetable garden soil after the season is over to add organic matter and improve soil moisture retention.
Replant your fall garden with a green manure crop such as winter rye or Austrian peas to add organic matter and improve soil water retention.
Practice efficient irrigation. Drip or trickle irrigation is ideal in the vegetable garden, reducing water usage by about 50%. The soaker hose is probably the least expensive and easiest to use in a vegetable garden setting. The soaker hose allows water to seep out all along its length at a slow rate. They typically run, at low pressure, for only 10 to 15 minutes per irrigation. There are also tubes with holes for the water to drip out. Another option is a simple 'hose bubbler' which is a hose end attachment to irrigate the base of a plant.
Check soil moisture regularly to avoid over-application. Squeeze soil in your hand; if it sticks together, it is moist and irrigation should be delayed.
Place soaker hoses or drip irrigation under the mulch used in the vegetable garden.
Know the critical watering periods for vegetables and you can target the timing and amount of water to add. As a rule of thumb, water is most critical during the first few weeks of development, immediately after transplanting, and during flowering and fruit production. The critical watering periods for selected vegetables follow:
Asparagus - Spear production, fern development.
Cole crops: broccoli, cabbage, and cauliflower - The quality of cole crops is significantly reduced if the plants get dry anytime during the growing season. Water use is highest and most critical during head development.
Beans - Beans have the highest water use of any common garden vegetable, using � to over � inch of water per day (depending on temperature and wind). Blossoms drop with inadequate moisture levels and pods fail to fill. On warm, windy days, blossom drop is common. For the observant gardener, a subtle change in plant color indicates a need for irrigation. When moisture levels are adequate the bean plant is a bright, dark grass green. As plants experience water stress, leaves take on a slight grayish cast. Water is needed at this point to prevent blossom drop.
Carrot and other root crops - For quality produce, these crops require a constant supply of moisture. They are intolerant of dry soils. Cracking, knobby and hot flavor root crops are symptoms of water stress.
Corn - Water demand for sweet corn is most critical during tasseling, silking, and ear development. Yield is directly related to quantities of water, nitrogen and spacing. Water stress delays the silking period, but not tasseling. Under mild water stress the crop may tassel and shed pollen before silks are ready for pollination. The lack of pollination may reduce yields or even eliminate ear production.
Lettuce and other leaf vegetables - Water demand is most critical during head (leaf) development. For quality produce these crops require a constant supply of moisture. They are intolerant of dry soils.
Onion family � Members of the onion family have an inefficient rooting system making irrigation management a key factor in produce quality. They require a constant supply of moisture and are intolerant of dry soils.
Peas - Water demand is most critical during pod filling
Potatoes - If potatoes become overly dry during tuber development, tubers will be knobby.
Tomato family: tomatoes, peppers and eggplant -- Water demand is most critical during flowering and fruiting. Blossom-end-rot (a black sunken area on the bottom of the fruit) is a symptom of too much or too little water. The tomato family has a lower water requirement than many vegetables and plants are often over-watered in the typical home garden.
Vine crops: cucumbers, summer and winter squash, and assorted melons - Water demand is most critical during flowering and fruiting. Vine crops use less water than many vegetables and are often over-watered in the typical home garden.
Make it a practice to water during early morning, when the wind is low and the temperatures are cooler.
Mulching minimizes evaporation of water from the soil surface, reducing irrigation need by around 50%. In the vegetable garden, use an organic mulch to a depth of 1-3 inches, depending upon the particle size of the mulching material. The larger the particle, the thicker the depth of mulch that should be applied. Mulch only after the soil has warmed sufficiently. Do not use wood or bark chips in a garden setting that requires annual soil preparation. The chips will interfere with future seedbed preparation.
Grass clippings make excellent mulch for the vegetable garden. Apply fresh clippings in thin layers (up to � inch thick) and allow each layer to dry before adding more. The clippings quickly dry down and additional layers can be added weekly. Do not place fresh clippings in thick piles, as they will mat, decay and smell foul. Do not use clippings from lawns that have been treated with herbicides or other pesticides in the past month. A couple of sheets of newspaper may be used under the clippings to help control weeds. Do not apply newspapers more than a couple of sheets thick, or a soil carbon to nitrogen imbalance may occur. Do not use glossy print materials, their inks may not be soy based like newspapers.
Black or colored plastic mulch conserves moisture and also increases soil temperatures. They are used on tomatoes, peppers, eggplants and the vine crop family (cucumbers, summer and winter squash, melons). Lay down plastic early in the season so plant growth shades the plastic from extreme summer temperatures. Do not apply plastic in mid summer. Do not use plastic on other crops.
Plant in blocks, rather than rows. This creates shade for roots and reduces evaporation.
Control weeds, they are competing with the vegetables for the water supply.
Group plants with similar water needs (i.e. families) together on the same soaker hose. Cucumber and zucchinis and squash, for example, require similar water applications.
Check the soil for moisture before you water. If the soil has dried out to a depth of 2-4 inches, plan to water. This is especially important if using mulch, where water can be held in the soil for longer periods of time.
Provide windbreaks to reduce evaporation of moisture from soil and plants.
COMPOSTING TECHNIQUES
History of Composting
Nature has been producing compost for millions of years as part of the cycle of life and death on Earth. The first human use of animal manure, a raw form of compost, was in about 3,000 B.C. in Egypt when it was spread directly on the fields as a fertilizer. Later, manure was mixed with dirty stable straw and other refuse and allowed to sit in piles until it was needed. Rain kept the piles wet and aided the decomposition process, producing a rich compost.
The Greeks and Romans knew the value of compost to boost crop production and even used the warmth of decomposing compost to produce summer vegetables in winter. Christian monasteries kept the art of composting alive in Europe after the fall of the Roman Empire, and by about 1200 compost was again being used by many farmers. Shakespeare mentions it in several of his plays written in the early 1600s.
In the United States, Presidents George Washington and Thomas Jefferson were prominent landowners during the late-1700s and early-1800s and both spent much of their time trying innovative farming practices, including experiments with various composting methods and materials. As years of successive crops depleted the nutrients in the soil on the East Coast, the practice of composting became widespread. This trend continued until the early 1900s when it was estimated that 90% of the fertilizer used in the United States came from compost.
That all changed in 1913, when a German company began producing synthetic nitrogen compounds, including fertilizers. These new chemical fertilizers could be produced less expensively than messy animal manure compost, and the farmyard compost pile quickly became a thing of the past. By 1950, it was estimated that only 1% of the fertilizer used in the United States was derived from compost.
The Compost Process
The composting process involves four main components: organic matter, moisture, oxygen, and bacteria.
Bacteria and Other Microorganisms
Bacteria and other microorganisms are the real keys to the composting process. As the bacteria decompose the materials, they release heat, which is concentrated in the center of the pile. Adding layers of soil or finished compost supplies more bacteria which speeds the composting process.
Add a starter material, such as animal manures from a grain eating animal.
Organic Materials
Organic matter includes plant materials and some animal manures. Organic materials used for compost should include a mixture of brown organic material (dead leaves, twigs, manure) and green organic material (lawn clippings, fruit rinds, etc.). Brown materials supply carbon, while green materials supply nitrogen. The best ratio is 1 part green to 1 part brown material. Shredding, chopping or mowing these materials into smaller pieces will help speed the composting process by increasing the surface area.
For compost piles that have mostly brown material (dead leaves), try adding a handful of commercial 10-10-10 fertilizer to supply nitrogen and speed the compost process.
Importance of Moisture to the Composting Process
Moisture is an important part of the composting process. If the pile is too dry, materials will decompose very slowly. Add water during dry periods or when adding large amounts of brown organic material.
If the pile is too wet, turn the pile and mix the materials. Another option is to add dry, brown organic materials.
Oxygen
Oxygen is needed to support the breakdown of plant material by bacteria. To supply oxygen, you will need to turn the compost pile so that materials at the edges are brought to the center of the pile. Turning the pile is important for complete composting and for controlling odor.
Wait at least two weeks before turning the pile, to allow the center of the pile to "heat up" and decompose. Once the pile has cooled in the center, decomposition of the materials has taken place. Frequent turning will help speed the composting process.
Compost Layers
Composting involves building a mound of alternating layers either in an open air environment or in a closed environment like a wood or metal container.
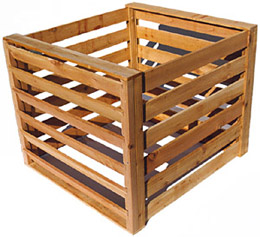
You can build your own compost bin using cedar boards spaced to leave room for aeriation. Leave off the bottom and lift the bin for easy rotation/aeriation of contents. Using multiple bins allow you to move and aeriate the compost layers from the start bin to the end bin.
For any compost action, start with a layer of organic material like coffee grounds, and fruits and vegetables. Follow with a layer of green nitrogen-laden by-products such as grass clippings. Then add a layer of cow manure topped off with a small layer of soil. Turn the mixture often and keep it moist which results in the generation of heat during the decomposition process. That's all there is to the process. The end result is a loose, dark colored soil rich in nutrients and earth worms ready for use on virtually any of your shrubs, flowers, trees, gardens, and lawns.

Raising Blackberries

Blackberries love the sandy soil we have here in the Rockdale area.
At Tweet-Suites farms in Rockdale Texas, we are experimenting with a variety of blackberry types including the following:
Brazos
Brazos is an erect blackberry released by the Texas Agricultural Experiment Station in 1959. It is early and has very large, fair quality fruit that is maintained over the entire fruiting season. The fruit is slightly sour and rather seedy. It is productive and is well adapted to fresh market outlets.
Cheyenne
Cheyenne was developed in 1977 by the University of Arkansas. Fruit is sweet, large and has a slight raspberry flavor. It ripens mid season.
Brison
Brison is a large, erect, high-yielding blackberry developed in 1977 by Texas A&M. Its fruit is firmer and sweeter than and it ripens in mid May.
Rosborough
Rosborough is another high-yielding berry developed in 1977 by Texas A&M . The fruit is firmer with smaller seeds than Brazos. Canes are very vigorous and thorny. It is adapted to the entire state. However, the Rosborough is very susceptible to rosette disease.
Shawnee
Shawnee is a consistent high yielder with medium large fruit. This University of Arkansas 1983 release ripens about one week later than Cheyenne. A peak in production during the harvest season is not apparent. Shawnee produces heavily for several consecutive weeks, making it an excellent PYO variety. The soft berries do not store or ship well. Shawnee is very susceptible to double blossom disease.
Choctaw
Choctaw is a 1989 release for the University of Arkansas that has erect canes and medium-size fruit. It is a very early variety with small seeds. The fruit is soft, with handling and storage qualities similar to Shawnee. Choctaw has a chill hour requirement of 300 � 400 hours and is susceptible to late freezes. It is susceptible to rosette disease. Choctaw is recommended for trial for early blackberries.
Kiowa
Kiowa is a 1996 release from the University of Arkansas with erect canes and very large fruit. The fruit is the largest of the Arkansas varieties, and the storage and handling qualities are good. Kiowa blooms just after Choctaw and Shawnee.
Chickasaw
Chickasaw is a 1998 release from the University of Arkansas with erect canes and very large fruit ripening near Shawnee. Storage and handling qualities of the fruit are better than Shawnee. Plants are high yielding. Chickasaw is susceptible to Rosette.
Arapaho:
Arapaho is the earliest ripening erect thornless variety. Fruit is medium size. Yields are about 60 percent of those of Shawnee. Fruit begins ripening a few days ahead of Shawnee. Arapaho is a 1993 release from the University of Arkansas that appears to be resistant to orange rust and rosette diseases. Arapaho has chilling requirements of 400 � 500 hours. Arapaho is recommended for commercial and home use.
Navaho:
Navaho is an erect blackberry with thornless canes. It has medium-size fruit with high sugar content and excellent flavor. It has firm berries with perhaps the best post-harvest shelf life. Yields are 60 percent to 75 percent of those of Shawnee. Navaho is tolerant of rosette but susceptible to orange rust. It is a 1989 release from the University of Arkansas. Navaho has an extended ripening season, beginning one week after Shawnee and continuing two weeks later than the last Shawnee harvest. Navaho has a chill hour requirement of 800 - 900 hours.
Apache:
Apache is a 1999 erect thornless blackberry release from the University of Arkansas. It has the largest fruit and highest yield of the Arkansas thornless blackberries. Fruit ripening is approximately five days after Navaho. Plants appear to be resistant to rosette disease and orange rust. White druplets or sunburn have sometimes been noted as a problem. Apache is believed to have chill hour requirements similar to Navaho.
Ouachita:
Ouachita is a 2003 erect thornless blackberry release from the University of Arkansas. The fruit is large and has good storage and handeling qualities. Fruit ripens with Kiowa and extends for about five weeks. Ouachita is resistant to rosette disease.
TIPS FOR GROWING BLACKBERRIES
Blackberries are easy to grow in home gardens. Blackberries are biennials and begin bearing the year after planting. The first year they can bear 2,000 pounds per acre, or about 8 gallons per 100 feet of row. Plants may produce for 15 years if managed; but, the best production is usually during years 3 through 8. Blackberries grow best in sandy soil; however, they can be grown in soils that are at least one foot deep, have good drainage, and have a range of pH 4.5 to pH 7.5. On soils with a pH of 8.0 or above, plants will experience severe iron chlorosis and chelate will be needed. If internal soil drainage is not fast, grow blackberries in a raised bed.
Blackberries are a warm southern climate crop and can be grown anywhere in USDA Hardiness Zone 7, 8, or 9. Rainfall or irrigation will be needed weekly.
PLANTING TIPS
Planting is usually done using root cuttings about the size of a pencil, which are dug in winter, and may be stored in moist sawdust or sphagnum moss wrapped in plastic. They are laid horizontally in the ground about 2 inches to 4 inches deep and 2 to 3 feet apart in the row. Dormant bareroot blackberry plants may also be planted during the winter. Plants should be spaced two to three feet apart in rows eight to twelve feet apart. Nursery plants in containers can be planted at any time of year, although early spring is best and watering will be critical.
PRUNING TIPS
Pruning is necessary to control diseases.During the first year, growth is sprawling and does not need topping. Although blackberry roots are perennial, tops are biennial. Prima canes are produced the first year and produce rapid vegetative growth only. Cut prima canes back when they reach 36 to 48" to encourage branching. Floricanes are the second year of the biennial cycle and bloom in March. The fruit ripens in May. After fruiting, the floricanes will die and should be cut to the ground. To make picking easier, some growers hedge the rows to a 4' height and a 3' width while others train the prima canes onto a vertical three wire trellis. Every three years mature plants need to be mowed to the ground to remove diseased wood and rejuvenate growth. This usually reduces yield the following year. It should only be attempted where irrigation can stimulate prima cane growth by the end of the season.
FERTILIZATION
Fertilization should be limited to nitrogen applied in small amounts in a band along the row, beginning at bloom. An initial soil test will indicate some deficiencies as well as pH. If soil pH is over 8.0, blackberries can show iron chlorosis, which is corrected with soil applications of Fe 138 Iron Chelate or foliar iron sprays every three to four weeks.
IRRIGATION
Irrigation is required for both new plantings and mature bearing plants. Drip irrigation lines can be buried at planting time, or laid on top of the ground beside the plants and covered with mulch. Begin irrigation in March or April and reduce watering by September in order to slow new growth and allow hardening of the canes. Infrequent winter irrigations may be needed during drought years.
WEED CONTROL
Weed control maximizes yields and minimize harvesting problems. If there are perennial weeds in the planting area, these should be killed before planting. They may be sprayed with glyphosate or glufosinate the year before planting berries. A mulch of hay or rotted wood chips will help to slow weed growth. Preemergent herbicides, Surflan and low rates of Simazine, may be applied by commercial growers.
HARVESTING TIPS
Blackberries should be picked every three days to obtain a maximum sugar content. Keep berries under refrigeration. The storage life is only one day without refrigeration.
CONNIE'S RECIPE FOR BLACKBERRY FRIED PIE
1/2 cup sugar
1 tablespoon cornstarch
1/2 cup water
2 cups blackberries fresh
2 cups flour, all-purpose
1/4 teaspoon baking soda
1/4 teaspoon salt
1/2 cup vegetable oil
1/3 cup milk
1 x vegetable oil for frying
Directions
Combine sugar, cornstarch and water in a saucepan; add
berries.
Cook and stir over medium heat until the mixture comes to a
boil.Then
Cook and stir for 2 minutes & set aside to cool.
Make the dough: Combine flour, baking soda and salt.
Combine oil and milk & stir into dry ingredients until mixture
forms a ball.
Roll out on a cutting board to 1/8-inch thickness dough; cut into ten (10) 4-1/2 inch circles.
Place 1 tablespoon blackberry filling on each circle. Fold over & seal edges with a fork.
Fry the pies in a skillet over medium heat in 1/4 to 1/2 inch hot oil
until golden brown, about 1 1/2 minutes per side.
Drain on paper towels.
PERSIMMONS-FOOD OF THE GODS
Firm-ripe persimmons are medium sized, oval or squarish like a flattened apple or tomato; they range from pale orange to deep red-orange in color, and are non-astringent when firm-ripe.
They are edible and delicious in their crisp firm state. However, they will have their best flavor if allowed to rest and soften slightly after harvest.

Our Persimmon trees here at the farm are loaded with tasty fruit that we're gathering by the bushel and making into Jams and Jellies.
The edible skins tend of the persimmon tend to be tough. Remove the skins with a potato peeler or sharp thin knife. Or, blanch fruit in boiling water 2 to 3 minutes, then dip them in cold water, as you would to peel a tomato. Slip off the skins when the fruit is cool enough to touch. Leave the skins intact if you intend to bake the entire fruit. Eventually, firm-ripe persimmons will become soft like the soft-ripe persimmons and are useable in any recipe calling for Persimmon pulp.
History of the Persimmon
The persimmon native to North America is the diaspyros virginiana that the Algonquin Indians called "putchamin, pasiminan, or pessamin," depending on the tribe. This persimmon was small, seedy and had an unpleasant taste when eaten before it was ripe. This astringent quality is caused by tannin that is in the persimmon before it rippens completely. The diaspyros virginiana persimmon was quite different from the persimmons we see in the markets today. It was the size of a grape and had to be left on the tree into the winter.
Growing wild, it varied in quality from tree to tree. Hernando de Soto and his conquistadors found the Native Americans eating bread made from what they called "prunes." The loaves they were fed were formed from dried persimmons.
The settlers of Jamestown described persimmons as "very sweet and pleasant to the taste, and yields on distillation, after fermentation, a quality of spirits." When Captain John Smith was not busy with Pocahontas, he is quoted as saying, "If it be not ripe it will drawe a mans mouth awrie with much torment; but when it is ripe, it is as delicious as an Apricock."
When Commodore Matthew Perry opened Japan to the West in 1855 he changed the persimmon scene forever. One little known sidelight of his journey was the return to the United States with persimmon trees that were planted in Washington, D.C.
According to Greek mythology, "diaspyros", the botanical name for the persimmon, means "food of the gods."
The Japanese persimmon that is actually a native of China, was imported into Japan at an early date and has become the national fruit and one of the traditional foods for the Japanese New Year. Sometime in the midv1800s, the first persimmon cultivar arrived in California. A sub-tropical plant, the persimmon grows well California and the Southeastern United States.
Today, there are hundreds of varieties of persimmon, but two types are commercially available. The Hachiya dominates with about 90% of the market. It is an astringent fruit, bright orange in color, and shaped like a large, slightly elongated tomato that almost comes to a point at the bottom. Hachiyas must be fully ripe to be enjoyed. Fully ripe means a mushy, intense orange, jelly-like texture that is a turnoff for many people. The taste is compared to that of an overly sweet apricot with a smooth, slippery texture.
The Fuyu, also bright orange in color, is a non-astringent variety slowly gaining in popularity. It is eaten when firm, just like an apple, shiny skin and all. You can recognize a Fuyu by its squat shape and flat bottom, close to the appearance of a medium-sized tomato.
Recipe for Persimmon Jelly
Ingredients for Persimmon Jelly:
4 lbs ripe persimmons
2 cups water
3 tablespoons lemon juice
1 pkg powdered pectin
1 cup honey
Directions:
Wash fruit & remove blossom ends. Place in 6 to 8 quart non reactive pot.
Add water & heat to boil.
Mash persimmons.
Reduce heat and simmer 10 minutes.
Remove from heat & strain to remove pits.
Measure out 3 cups of pulp; stir in lemon juice and pectin & heat to boil. Add honey and bring contents to full boil for 2 minutes, stirring constantly. The jelly is now ready to add to your jar.
Nutritional Breakdown for one
One Medium-size Raw Persimmon
118 Calories, 134.9g Water, 0.3g Fat, 168g Weight, 1.0g Protein, 31.2g Carbohydrate 13mg Vit.C, .03mg Vit.B-2, 13mcg. Folate, 3640 IU Vit.A, 0.5mg Vit.B-1, 0.2mg Niacin, 3mg Sodium, 13mg Calcium, 15mg Magnesium, .18mg Zinc,.596mg Manganese 270mg Potassium, 28mg Phosphorus, .26mg Iron, .190mg Copper.
RAIN WATER CAPTURE SYSTEMS

Here at the farm, we are busy designing and installing a rain water capture system to reduce our dependence on subsurface water and supply our plants and trees with natural rain water.
History of Rain Water Capture Systems
Historically, rain water capture systems have been in use a long time dating back to the Middle and Late Bronze Age (2200-1200 BC) in the Middle East, Roman Empire and by Native Americans in North America.
Rainwater was collected during the short rainy seasons and lasted through at least one dry season. These cisterns provided water for home, garden, livestock, and agricultural purposes.
Elements of the Basic Rain Water Capture System
There are six basic components to any type of rain water capture system:
1. Catchment Area/Roof-surface that rain falls on
2. Gutters/Downspouts to move rain water from the Catchment Area to a cistern for water storage
3. Leaf Screens/Roofwashers to prevent debris from entering the system
4. Storage Tanks (Cistern) to store the collected rainwater
5. Using gravity, manual labor, or a pumping system for water distribution
6. Water Treatment (filters plus additives) to settle, filter and disinfect stored water
Cistern Types
Cisterns can take many sizes and shapes, depending on the planned amount of water storage.
Plastics Garbage cans(20-50 gal) Commercially available Use only new cans or
Fiberglass
Polyethylene/Polypropylene
Steel drums (55 gal) Commercially available
Galvanized Steel Tanks
Concrete and Masonry Ferrocement
Stone, Concrete Block
Wood such as
Redwood, Douglas Fir, or Cypress
Quality of Collected Rain Water
Water collected from a roof will vary in quality depending on type of roofing
material. Galvanized steel, aluminum and shingles are the most suitable roofing
materials for rain water collection. Factors to consider before using a roof as a catchment include:
Roof should be smooth�rough surfaces collect dirt and debris which affect
the runoff
Gutters and downspouts should be easily cleaned.
Painted roofs, certain wood shingles and certain asphalt shingles may impart
objectionable taste or odor.
Atmospheric pollution in some areas may affect quality of water from a roof
Rain water picks up dust, soot, bird droppings and other foreign material as it
falls over a roof. Special equipment is recommended to help make rain water more
acceptable for use.
Using Gutter Guards
Screens made of 1/4 to 1/2� hardware cloth and fitted over the roof gutters will
keep leaves, twigs and other material out but let water flow into the gutter.
Roof Washers
A roof washer is
a �trap� to collect the first flow of dirty water from the roof (about 10 gallons for each 1,000 sq ft of catchment) and positioned so that the downspout drains into it. An outlet pipe near the top of the
washer tank is connected to the cistern. A small trickle drain (1/8" hole) in the bottom
of the tank to permit it to empty between rains. Hardware cloth (1/4") is placed over the
top of the washer tank.
Commercial type roof washers are available in various sizes. These washers
contain fiberglass screens and are usually placed over the cistern inlet.
Using Other Means of Filtering Water
Sand, charcoal and gravel combination
filters may also be used for filtering
water before it enters the cistern.
These filters are more expensive
to construct and require more servicing.
Filters usually become highly
contaminated in a short time unless
properly maintained. Cleaning a sand
filter is more difficult than cleaning
a roof washer.
Batch Treatment for Making Rain Water Safe to Drink
Batch treatment is usually done manually as new rain water or hauled water is added to the cistern. First determine the cistern water volume in gallons by measuring depth, width and length (for a circular cistern, measure the depth and diameter). Since free chlorine dissipates with time, weekly treatment is necessary if new water is not added to prevent high bacterial population from returning.
After the water volume is determined, add 1 ounce (volume) of 5% chlorine bleach per 200 gallons of water to the cistern weekly. This gives a maximum disinfectant concentration of 2 mg. free chlorine/liter. This concentration leaves a chlorine taste to the water which dissipates with time.
Batch treatment requires agitation to thoroughly mix the water with the chlorine. Bacteria are eliminated from the water, but sediments in the cistern bottom still contain very high bacterial populations that can contaminate the water above when the free chlorine dissipates.
Cistern water that was superchlorinated (3 to 5 mg. free chlorine/liter) did not eliminate the indicator bacteria (coliforms and P. aeruginosa) in the sediment. Since this sediment mixes with the fresh water each time hauled water is dumped into the cistern, contamination of this water is possible.
A baffle or splashplate will help but not completely eliminate this risk. A splashplate breaks the force of water entering the cistern through the inlet during a rainfall event or while filling the cistern with hauled water.
Removing Undesirable Taste and Odor
Eliminating musty taste and odor as well as color and suspended matter from cistern water requires additional steps.
1. Use chlorination as previously described. The taste of chlorine should disappear in 24 to 36 hours after treatment.
2.If the taste of lime is not removed by cleaning the new cistern (see section on cleaning cisterns), use baking soda. Apply at the rate of 2 pounds of soda in 2 gallons of water for each 1,500 gallons of water in the cistern.
3.If water to the household is provided by a pressure pump, a commercial type filter using activated carbon or charcoal may be installed past the pressure pump. This filter will remove bad tastes and odors, but it will not purify the water. The water must be decontaminated before it passes through the filter.
Removing Undesirable Water Color
Rainwater collected from sooty roofs and gutters or downspouts containing decayed leaves or twigs may have an undesirable dark color. Water from new roofs, especially those of wood shingles, may also have "off' colors. These colors can usually be removed by adding soda and alum to the water. These chemicals will form a sludge or sediment which will settle to the bottom in about 24 hours and carry the color with it. The solution should be prepared as follows:
Solution 1. Dissolve 3/4 pound of ordinary baking soda (sodium bicarbonate) in one gallon of water.
Solution 2. Dissolve 1 pound of alum (potassium aluminum sulfate crystals) in 1/2 gallon water. If available, 1/2 pound of "filter alum" (aluminum sulfate), which is cheaper than alum, may be used and added to 1/2 gallon of water.
CAUTION: Do not use "Burnt Alum."
For each 30 gallons of water in the cistern, add 1/2 pint of solution No. 1 and stir, then add 1/4 pint of solution No. 2 and stir again. The amount of precipitate is relatively small and can be removed from the bottom of the cistern when it is emptied and cleaned.
Cleaning A Cistern
Before a cistern is used, it should be cleaned and disinfected by scrubbing the interior with a solution of 1/4 cup of 5% chlorine bleach mixed in 10 gallons of water. CAUTION: Be sure there is ample ventilation for the workers inside the cistern. Before the cistern is filled with drinking water, the interior should be hosed down until the chlorine odor disappears; then the cistern should be drained.
A cistern should be cleaned every five years or more often in areas with leaves or blowing dust or homes with coal or wood stoves.
This is a work in progress. Will be adding to this site for the next few weeks. Come back and watch our progress.
|

 For more information, send me an Email or call me at
(512) 630-4619.
For more information, send me an Email or call me at
(512) 630-4619.